Skip navigation


So how does one get this face to face shot of four African Lions without getting eaten?  You sit really, really still.

Well, no… not quite.

If you’re an experienced wildlife photographer like Chris McLennan, you design and fabricate your own remote control range rover complete with a Nikon D800 and operate from a safe distance.    Chris is a New Zealand based commercial photographer famous for his adventure and wildlife photography who offers the opportunity to tour with him in Alaska, Botswana and Norway among other places.

To get this shot, Chris had built a remote car (affectionately named as “Car-L”) around an Aquatech sound blimp.  The blimp serves two purposes… it muffles the sound of the shutter so as not to startle the lions while at the same time (and more importantly), protects the camera from being destroyed by said lions.

Enjoy the vid and be sure to checkout Chris’ website and facebook page.

A photographer friend invited me to join him in a “fun shoot”… not client work, just shooting for the sake of shooting.  He was bringing two models with him to Wilmington to shoot in random areas around the city and thought it would be fun to hang out and see what we could come up with without any preplanning.  Between us we had minimal gear… two cameras, three speed lights, a reflector and a portable softbox… oh, and a colored gel or two.

Most of the afternoon I kept low key and assisted him as he shot in various locations.  I am always content to assist other photographers, as it allows me to watch how others work and at the same time, build great relationships.  Regardless of whether it’s my shoot or someone else’s, I simply love being an active part of the image making process.

We eventually came to an alley with a thrilling environment. I turned to my friend and said… “My turn”.  It was the middle of the afternoon, probably around 2 pm, but I was envisioning a night shot with a subject just screaming at the top of his lungs.  I had the model change into some plain clothing while I frantically searched my gear bag for a CTO gel.

Cameras are designed to figure out your environment and automatically adjust themselves to give the correct color cast.  If you know how your camera operates, you can fool it into thinking you’re shooting indoors when in fact you are outside.  That’s exactly what I did for this shot.  I tricked the camera into giving me a blue color cast… I then gelled two of the lights to bring back some normal skin tone on the model.   Afterwards, I opened the image in photoshop and jacked up the contrast and saturation levels.  All tolled, it was about a 10 minute shoot with about 5 minutes of photoshop.  Nothing ground shaking, just a fun spur of the moment image.

Image


Being Swiss, its only natural that I am a big fan of beer.  But I have to admit, I wasn’t always an aficionado, it was an acquired taste… and naturally, I acquired that taste in college (my very first day in fact).  Of course in college, one doesn’t truly enjoy the beer as much as its effects.   Having put those wilder days behind me, I have come to appreciate the flavor and ambiance of having a tall cold one with friends.

Did you know that beer is actually very healthy for you… in moderation, of course.  Here are some interesting health facts about beer that you may not have been aware of…

1)   it increases cognitive ability

2)   It helps prevent diabetes 

3)   Beer drinkers live longer

4)   It lowers your risk for heart attack  

5)   It lowers your risk for kidney stones

With all those health benefits, I figure its time for me to start drinking regularly again! – notice I said “regularly”, not “heavily” –  In fact, I’ve decided to bring back an old tradition my roommates and I had in college… Try New Beer Night.  Every so often I will be spotlighting various beers and the breweries that produce them.  This month’s beer is Yuengling Lager.


Image


Yuengling is made in Pottsville, PA and is famous for being the oldest brewery in the America and the favorite beer of President Obama.     I’ve always found you can’t go wrong when ordering this beer… it just tastes great in any season or situation.  It has a nice amber/caramel color with a pleasant aroma and goes down smooth.  With an alcohol content of only 4.4% and priced at just over $1/bottle, it won’t drain your wallet or your brain cells.


Image

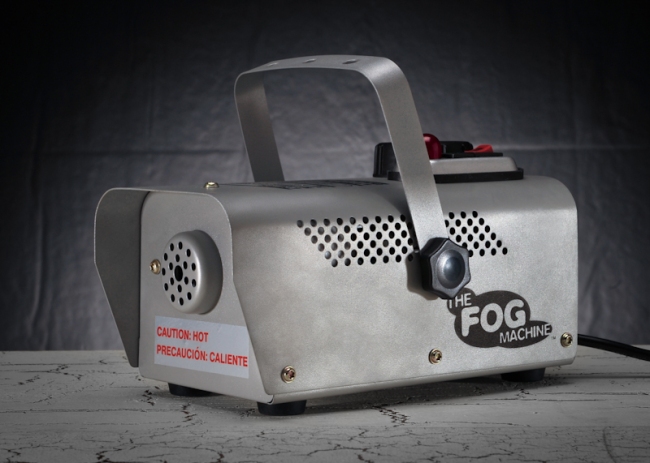
Right now stores are stocked full of Halloween props and one of the favorites among photographers are smoke and fog machines.  If you buy right now, you’ll pay a premium for one. But if you wait until the days after Halloween, the stores will be knocking 50% off the prices to clear out their inventories.  I scored this guy last year at Walmart for $11.  Its on the shelves this year again for $35…. I kinda nice having that extra $24 in my pocket.

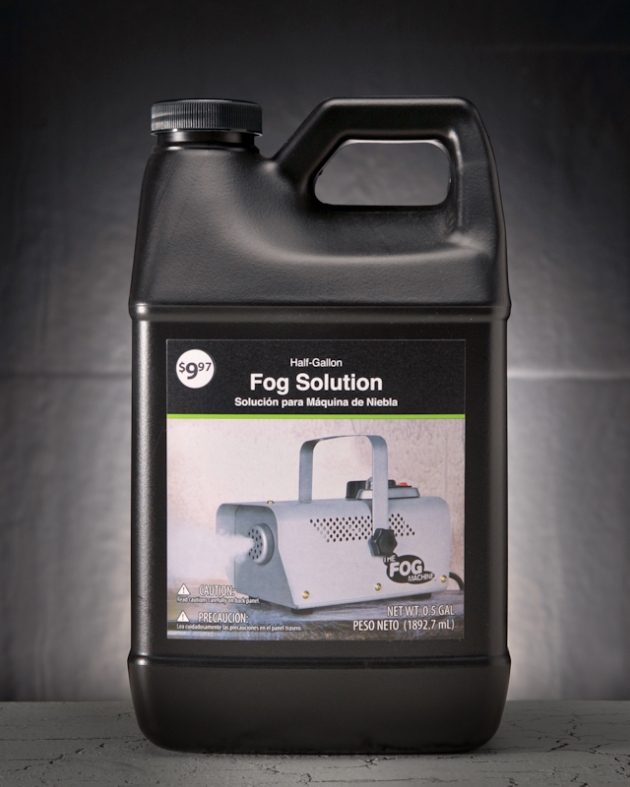
Here’s a tip for you… while there will be plenty of fog machines available on November 1st, the supply of fog solution will be nil. That’s because stores only stock one bottle for each machine. So pick-up your fog solution now while there’s plenty, then get the machine after they go on sale.  Otherwise, you’ll be stuck waiting a year like I was.

Image

A quick review of this particular unit…

Keep in mind the machine is only $35 (even less if you wait till after the holiday), so you get what you pay for.  The Fog Machine was designed for Halloween décor, not big production shoots. If you need perfect smoke/fog, then you need something along the lines of a Rosco 1700 and a coldflow.  So don’t be expecting great things… this little guy shoots out smoke for about three feet that immediately rises.  It has a noticeable smell and will set off smoke alarms.  Its best used outdoors, but if used indoors, by all means have some plan for adequate ventilation.

For low budget imagery, the unit can serve your purpose well once you’ve played around with it.  Using short controlled bursts is the key.  The machine comes with a remote trigger, but its range is horribly inconsistent.  Standing directly in front of the machine I was able to trigger it from 35’… but as I moved around it in different directions, the range dramatically dropped as low as 6’ in some areas.  You’re likely going need an assistant to manually trigger it on a shoot.  I personally did not find the remote to be reliable enough for my needs.

Its solution efficient – meaning a little lasts a while, but it has a slow warm-up (4 mins) and recharge time (2 mins).  The machine can shoot a burst for as long as 40 seconds, but most of that is going to rise up into the air.  After those longer blasts, it has to take time to warm up again.

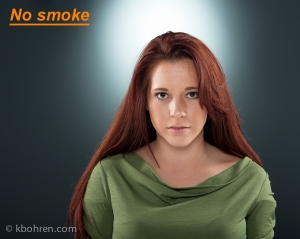
The captures below  are straight out of the camera and show just how quickly the smoke rises and fills a 22′ x 32′ studio.   My 5’4″ model was standing on an apple box with the machine on the floor three feet behind her.  I hit the remote and gave it about a ten second blast of smoke while I started shooting.  The doors to the studio were open, but no fans were used.

KJB_Fogtest KJB_Fogtest1 KJBfogtest2

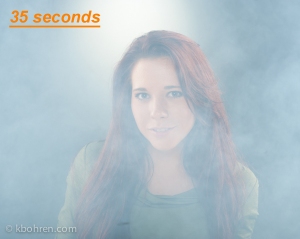
As you can see, in just five seconds the smoke is rising over her head.  After thirty-five seconds, the smoke has risen and filled the room to the point where one cannot get a usable image.  Now, to be fair, I had only intended on using a one or two second burst, but once the machine started, the remote wouldn’t stop it.  Though I was only 10′ from the machine, the model was between us and blocking the signal.  It took about ten seconds for me to run over and unplug it from the wall.  Like I said earlier… you’re going to need someone to operate it manually  for guaranteed results.

KJBfogtest3

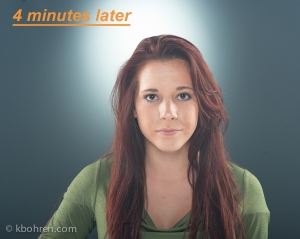
Even after four minutes has elapsed, the room still has a strong haze and you can see just how thrilled the model is about having to stand there and wait.  In all, it took about 25 minutes with fans blowing to clear out the room… not the kind of time you can afford to burn between frames.  To sum it up, low cost gets you low quality.  But I’m not throwing in the towel just yet… I’ll play it with more to try and find the combination that gives me the results I need for low budget shoots.

Image

So I get a call…  “Need you to shoot the SABLE unit tomorrow, the original photog had to cancel due to emergency.”  SABLE stands for  Southeastern NC Airborne Law Enforcement, it’s primary purpose is to support and increase the effectiveness of officers in the field through aerial observation and communication.  The SABLE program is a multi-agency effort, shared between the Wilmington Police Department, New Hanover County Sheriff’s Office, Leland Police Department, and the Pender County Sheriff Department.

At first I was plenty excited, I mean who doesn’t want to photograph helicopters… but that feeling soon waned.  They wanted a group shot and some aerials for submission to a law enforcement magazine.  The problem was, they had scheduled the shoot for 4:30 in the afternoon… in June.  Midday sun is not a photographer’s friend,  nor mid-ninety temps in the humidity of southeastern North Carolina for that matter.

With such short notice, I didn’t have a chance to scout the location until a couple of hours before the scheduled start time.  Fortunately, there was plenty of space inside the hangar… while I was not able to exert influence over the shoot time; I now had a location where I had total control of the light.

The copter is stored on wheeled dollies, which makes it easy to position. So rather than have the crew outdoors squinting into the harsh sun, I positioned them inside where I could use strobes and control the look.  The officers arrived thinking someone with a camera would be taking a few snapshots, so its safe to say they weren’t highly enthused from the start.  But once they saw the setup and the first images out of the camera, they suddenly had a change of attitude and were rushing to a mirror to primp themselves!

Image

As I mentioned, the purpose of the shoot was to generate publicity for the program and show off the thermal imaging camera (FLIR). So after shooting the group and individuals, the pilots took to the air for some working shots.

Image

The SABLE program actually has two helicopters – Army Bell OH-58C Kiowas. Both aircraft were acquired through the Government 1033 Program, at no cost to the City. This program allows agencies whose primary function is law enforcement to acquire surplus military equipment.

Image

Here you get a good view of the advanced Multi-mission FLIR Ultra 8500 forward looking infrared camera and the Nightsun SX16 Searchlight.  The lieutenant in charge of the unit was extremely pleased with the images and I scored a couple of free rides in the copter.   More creative shoots are planned for the future.

Image

If you’ve ever shot dogs in studio before, you know you have about 90 seconds of their attention and that’s it.  Show dogs on the other hand are much easier to shoot, they are predisposed to holding a position and being in the spotlight.  Police K9s?  Well, they obey well, but they’re high strung because they think they’re going to play… and to them “play” usually means chasing down some crook and chomping him like a chew toy.  That’s rather intimidating when the only thing  between you and them is the camera – especially when they are looking at you as though they are aching for the command to pounce!

Remember when I said I was worried the K9s may have issues with the table?  On cue those beasts leaped effortlessly on it as if they were cats.  Of the five dogs, only one seemed to be in hurry to jump off the table.  The others hammed it up pretty well.

Image

Using the table setup certainly was the way to go.  Once the dogs were done, it only took a few minutes to get through the handlers.  The only challenge there was getting good expression… by nature, cops strike an “infallible” pose.  I wanted to show their human side in these portraits and save “infallible” for the group shot.  It wasn’t easy.  I had to pull out some really corny jokes to get them to relax and smile.

Image

It was now time to shoot the group as a whole and I saw this as an opportunity to use a lighting set-up I had never used before, but wanted to try.

I was envisioning outdoors in the evening, but needed soft light.  I also needed a secluded place, with power available to run my strobes.  Fortunately, the management at PPD allowed me to use their employee parking deck.  I had scouted the building the previous week and selected my area… I can’t stress enough the importance of location scouting.  On this occasion, I discovered I would need approximately 300’ of extension cord and about 200 pounds of sand bags for the light stands. Larger groups mean larger light sources; with even a small breeze, large light sources become sails.  Since we were shooting on the top level of the deck, weighing down the lights was paramount.  Losing a light to the wind is one thing, having it crash on a person six stories below is another.

The last major challenge was the dogs.  K9s are alpha dogs and don’t always play well in groups.  Shooting at sunset means slower shutter speeds and trying to keep five dogs tightly posed and still just ain’t gonna happen.  The solution was to shoot the handlers alone and then bring in each dog individually.  The final image is a composite with all the dogs.

When all was said and done, the results of the shoots exceeded the expectations of the department.  As a result, we have a number of future projects planned for additional department units.

Image

Jill Greenberg does some amazing things with light.  Studying the work of the best, regardless of your field, is an excellent way to improve yourself and advance your own creativity.  Having your work emulated by others can be the greatest compliment.  With that said, the shot above was not intended to be a copy of Jill’s work, though her lighting style was part of the inspiration.

My assignment was to photograph the local police K9 unit and was allowed to shoot them in any style I chose.  For years they’ve had more traditional images taken and this year they wanted to go in a different direction.  I decided on the type of look I wanted and mapped out my lighting.  Given dogs and humans stand at different heights, I wanted to save time and create a set-up where I didn’t have to keep moving lights up and down for each subject. The design was a plywood board set upon two sawhorses.  I could place the dogs on the board for their shots, then easily move it out of the way for the handlers…. problem solved.  I decided to use my roommate’s golden retrievers as stand in models and soon learned something I would learn no other way.

The board I was using has many coats of white enamel paint, making it a tad slick.  Once the dogs were on the board, they were terrified of the footing and immediately lay down. No amount of coaxing could get them to sit up.  Simple fix… clamp down a rug to the board.  But even with better footing, the dogs still didn’t like being 3’ off the ground.  So enter my 15-month-old model, Owen.  He’s the son of a friend who my roommate was babysitting for at the time.  I turned to her and said, “throw the kid up there”.  Once she let go, Owen started crying… I quickly snapped a couple of shots and viola… Jill Greenberg rip-off.

With the lighting set, I was left to wonder if police K9s will be worried about being on a table.  So I called the lead handler for his opinion… “Three feet?  That’s all?”… Apparently I need not worry.